


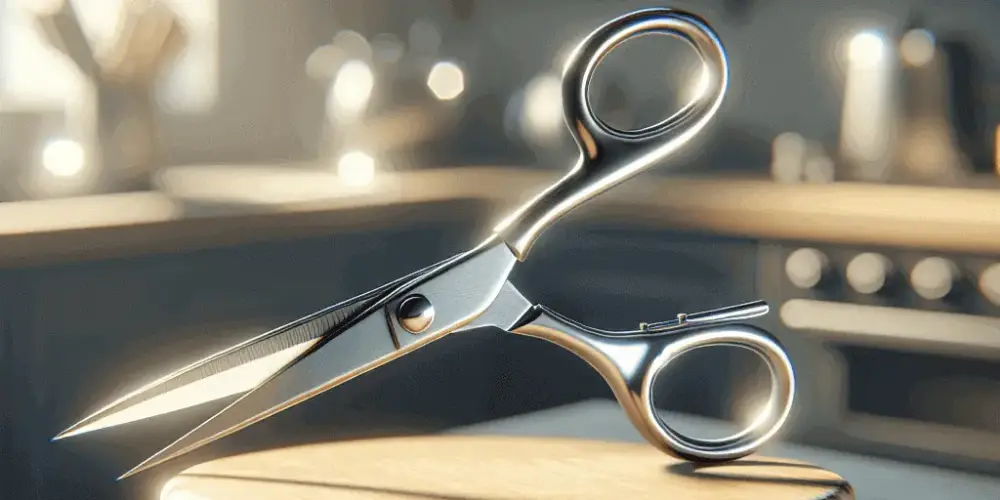
If you have a pair of scissors in your kitchen drawer, chances are they’re dull. Most people’s are, anyway. That’s because very few home cooks know you can sharpen scissors, let alone how to do it. Fortunately, sharpening them is as easy as sharpening kitchen knives. This article will walk you through how to sharpen different types of scissors at home, including kitchen scissors, fabric scissors, hair-cutting scissors, and paper scissors. We’ll show you five different ways to get these handy household items to cut through food, fabrics, hair, and paper like they did when you first got them. Once you’re done reading our guide, you won’t have a problem with dull scissors ever again.
How often should you sharpen kitchen scissors?
Before you begin sharpening your kitchen scissors, it’s important to prepare them for the process. Start by inspecting the pair of scissors and identifying any rust or debris that may be affecting their cutting performance. Clean the scissors thoroughly using a damp cloth or paper towel to remove any dirt or residue. Pay special attention to the edge of the blade, as this is the area that needs to be sharpened. Removing any rust or grime will ensure a smooth and effective sharpening process for the entire edge.
Cleaning Before Sharpening
Cleaning your kitchen scissors before sharpening is an essential step to ensure a successful sharpening process. Start by wiping down the scissor blades using a damp paper towel or cloth. This will remove any debris or food particles that may have accumulated on the blades, which can affect the sharpening process. Pay close attention to the blade of the scissors, as this is the area that needs to be sharp for efficient cutting. Make sure to clean both sides of the blade thoroughly, as well as any other parts of the scissors that may have come into contact with food or other substances. Once the scissors are clean, you can proceed to the next step of the sharpening process.
Identifying Dull Spots
Before you start sharpening your kitchen scissors, it's important to identify any dull spots on the blades. Dull scissors may have areas on the blade that are not as sharp as others, causing them to struggle when cutting through food. To identify these dull spots, carefully examine the side of the blade. Look for any areas that appear worn or have lost their sharpness. These spots may be more noticeable on the beveled edge of the blade, which is the part that makes contact with the material you are cutting. Once you have identified the dull spots, you can focus on sharpening those areas to restore the cutting edge of your scissors.
Methods to Sharpen Kitchen Scissors
There are several methods you can use to sharpen your kitchen scissors at home. Each method utilizes different tools and techniques to restore the cutting edge of the scissors. Some common methods include using a sharpening stone or sharpener, cutting through aluminum foil, slicing sandpaper, or using a glass jar technique. By following these methods, you can easily sharpen your kitchen scissors and ensure they are always ready for use.
Using a Sharpening Stone for Precision
Using a sharpening stone is a popular method for sharpening kitchen scissors with precision. The coarse side of the sharpening stone helps to remove any dull spots and restore the cutting edge of the scissors. Here's how you can use a sharpening stone to sharpen your kitchen scissors:
- Place the sharpening stone on a flat surface, with the coarse side facing up.
- Hold the scissors with one hand and the stone with the other.
- Position the beveled edge of the scissors flat against the stone.
- Apply light pressure and move the scissors along the stone, from the base to the tip.
- Repeat this motion several times, focusing on the areas that need sharpening.
- Flip the stone over to the finer side and repeat the sharpening process.
- Finally, wipe the blades of the scissors with a clean cloth to remove any metal shavings.
Using a sharpening stone allows for precise control over the sharpening process, ensuring that your kitchen scissors are sharp and ready for use.
Cutting Through Aluminum Foil for Quick Sharpening
If you don't have a sharpening stone, you can still sharpen your kitchen scissors using aluminum foil. This method provides a quick and easy way to restore the cutting edge of your scissors. Here's how you can sharpen your kitchen scissors using aluminum foil:
- Take a piece of aluminum foil that is at least 10 inches long.
- Fold the foil lengthwise several times to create a thick strip.
- Hold the scissors and cut through the folded layers of aluminum foil.
- Make sure to run the full length of the cutting edge through the foil.
- Repeat this process several times, focusing on the areas that need sharpening.
- Wipe the blades of the scissors with a clean cloth to remove any residue.
Using aluminum foil as a makeshift sharpening tool can help improve the cutting performance of your kitchen scissors when a sharpening stone is not available.
Slicing Sandpaper to Remove Burrs
Another method for sharpening kitchen scissors is by using sandpaper. Sandpaper has abrasive particles that can help remove burrs and restore the cutting edge of your scissors. Here's how you can sharpen your kitchen scissors using sandpaper:
- Take a sheet of sandpaper with a grit of 150 to 200.
- Fold the sandpaper in half so that the abrasive sides are facing out.
- Cut through the sandpaper with your scissors, making full-stroke cuts.
- Make sure to run the full length of the cutting edge through the sandpaper.
- Repeat this process several times, focusing on the areas that need sharpening.
- Wipe the blades of the scissors with a clean cloth to remove any residue.
Using sandpaper can be an effective way to remove burrs and restore the cutting edge of your kitchen scissors, especially if they are only slightly dull.
Improving Edge with a Glass Jar Technique
Surprisingly, a glass jar can be used to sharpen kitchen scissors and improve their cutting edge. This technique is simple yet effective. Here's how you can sharpen your kitchen scissors using a glass jar:
- Take a glass jar, such as a beer bottle or mason jar.
- Hold the jar firmly with your non-dominant hand.
- Cut the top of the jar or bottle with the kitchen shears.
- Make sure the whole cutting edge of the blade runs against the glass.
- Repeat this motion several times, focusing on the areas that need sharpening.
- Wipe the blades of the scissors with a clean cloth to remove any residue.
Using a glass jar can provide a quick and efficient way to sharpen your kitchen scissors without the need for specialized sharpening tools.
Fine-Tuning and Testing the Sharpness
Once you have sharpened your kitchen scissors using any of the above methods, it's important to fine-tune and test the sharpness of the scissors. This ensures that they are ready for use and can cut through food easily and efficiently. To fine-tune the sharpness of your kitchen scissors, use a honing steel to straighten out the rough edge of the blade. Then, test the sharpness by snipping the blades together a few times. This will hone the blades and ensure they are ready for use. Follow these steps to fine-tune and test the sharpness of your kitchen scissors:
- Adjust the tension of the scissors if necessary.
- Test the sharpness by cutting through various materials, such as paper or fabric.
- If needed, repeat the sharpening process or make additional adjustments to the scissors' tension.
By fine-tuning and testing the sharpness of your kitchen scissors, you can ensure that they are in optimal condition for all your food preparation needs.
Adjusting the Scissors' Tension
In addition to sharpening your kitchen scissors, it's important to check and adjust the tension of the scissors. The tension determines how tightly the blades are held together and affects the scissors' cutting performance. To adjust the tension of your kitchen scissors, follow these steps:
- Open the scissors fully and locate the screw or nut at the pivot point.
- Using a screwdriver or pliers, tighten or loosen the screw to adjust the tension.
- Test the scissors by opening and closing them to ensure smooth movement.
- Make further adjustments as necessary to find the optimal tension for your scissors.
By adjusting the tension of your kitchen scissors, you can improve their cutting performance and prolong their sharpness.
Testing on Various Materials
After sharpening and fine-tuning your kitchen scissors, it's important to test them on various materials to ensure their sharpness and cutting ability. Here are some materials you can use to test your kitchen scissors:
- Paper: Cut through different types of paper to check the scissor's precision and smooth cutting action.
- Fabric: Try cutting through different fabrics to test the scissors' ability to make clean and accurate cuts.
- Cardboard: Cut through thick cardboard to see if the scissors can handle tougher materials without snagging or tearing.
By testing your kitchen scissors on various materials, you can evaluate their cutting performance and make any necessary adjustments or further sharpening if needed.
Maintaining Your Scissors' Sharpness
Now that you have successfully sharpened your kitchen scissors, it's important to maintain their sharpness for long-lasting performance. Regular cleaning, proper storage, and occasional oiling are key to keeping your scissors sharp. Here are some tips for maintaining your scissors' sharpness:
- Regularly clean your scissors after each use to remove any food or debris.
- Store your scissors in a dry and safe place, such as a kitchen drawer or a designated scissor holder.
- Occasionally apply a few drops of oil to the pivot point of the scissors to keep them lubricated and prevent rust.
By following these maintenance tips, you can ensure that your kitchen scissors remain sharp and ready for use whenever you need them.
Regular Cleaning and Oiling
Regular cleaning and oiling are essential for maintaining the sharpness and longevity of your kitchen scissors. After each use, make it a habit to clean your scissors thoroughly with a damp paper towel or cloth. This will help remove any food particles or residue that may have accumulated on the blades. Additionally, it is recommended to apply a few drops of oil to the pivot point of the scissors. This will help keep the blades lubricated and prevent rust. By incorporating regular cleaning and oiling into your maintenance routine, you can ensure that your kitchen scissors stay sharp and in optimal condition for all your cutting needs.
Proper Storage Practices
Proper storage of your kitchen scissors is crucial for maintaining their sharpness and preventing any damage. Here are some storage practices to keep in mind:
- Store your scissors in a dry and clean environment to prevent rust or corrosion.
- Avoid storing your scissors with other utensils or objects that could potentially damage the blades.
- Consider using a designated scissor holder or a kitchen drawer to keep your scissors safe and easily accessible.
- If you have multiple pairs of scissors, consider labeling them to avoid confusion and ensure you're using the right one for the job.
By following these storage practices, you can protect your kitchen scissors and prolong their sharpness, ensuring they are always ready for use.
Conclusion
In conclusion, keeping your kitchen scissors sharp doesn't have to be a daunting task. By following simple techniques like using a sharpening stone, cutting through aluminum foil, or even slicing sandpaper, you can maintain their edge. Regular cleaning, oiling, and proper storage are key to prolonging their sharpness. Remember, a well-maintained pair of kitchen scissors can make meal prep a breeze. So, take a few minutes to give them the care they deserve, and you'll always have a reliable kitchen tool at your fingertips. Happy cooking!


